Notes on Minecraft's Customizable Player Models mod.
(including a few tutorials missing from the official documentation)

So.
While writing this guide I discovered that there is already a wiki in the mod itself. Written by the creator of the mod. I suggest you go read that instead .
But. If you are dead-set on learning the basics from a fool who stumbled their way through the editor over the course of a few months, by all means keep reading.
1: GETTING TO THE EDITOR
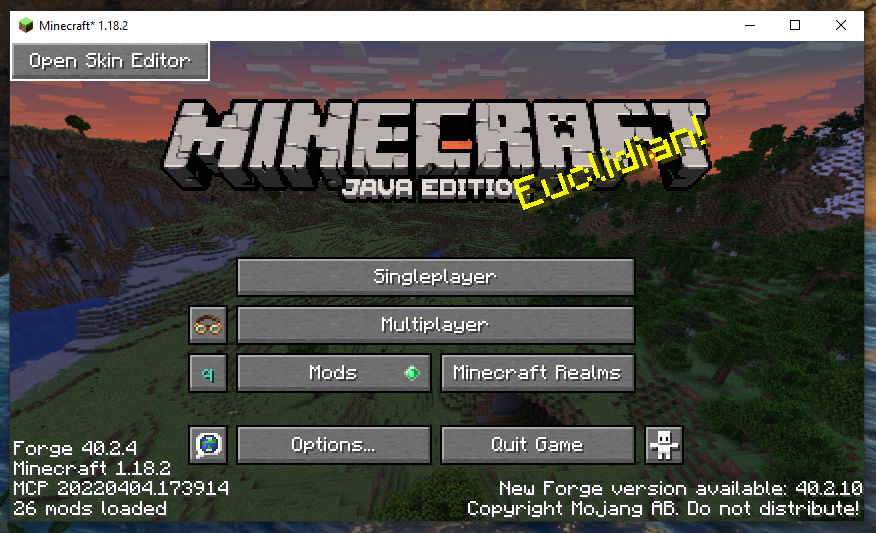
The first thing to learn in any program is how to move around in it. The editor can be accessed from a button on the main menu (see fig. 1)
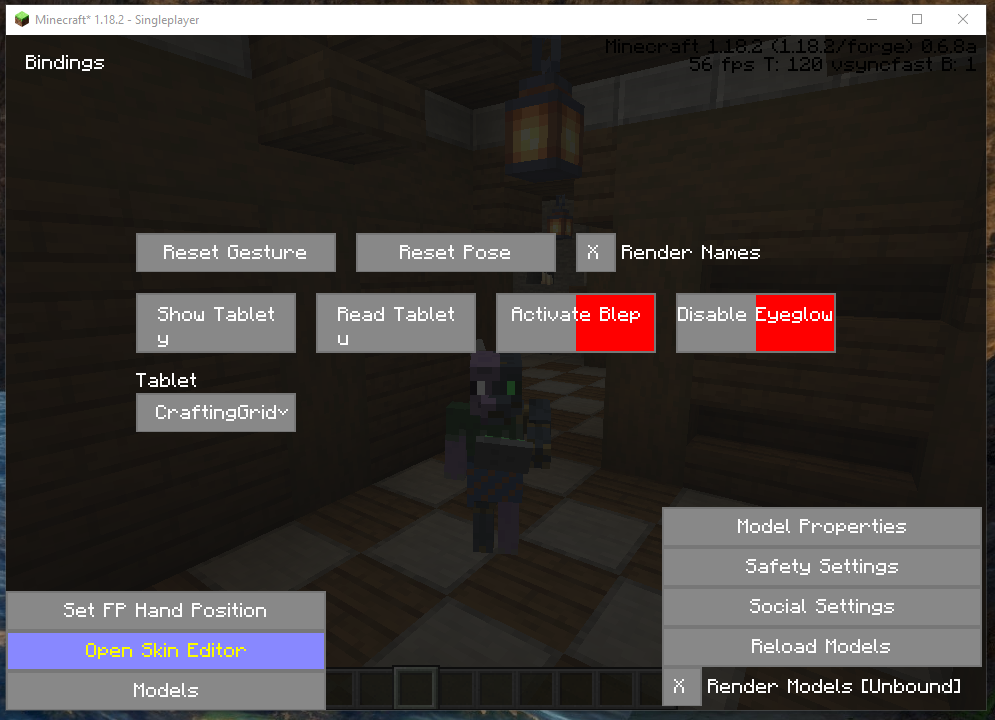
Or through the gesture menu (figs. 1b and 1c), which can be accessed in-game by pressing a button. I think it's g by default?
|
| Figure 1a: The "Open Skin Editor" button as it appears in the top left of the Main Menu. |
|
| Figure 1b: The Gesture menu, which you can open by pressing g. Unless another mod has already taken that binding (like Curios, my beloathed), in which case you will need to do some Keybind reassignment nonsense in the game's Options menu. Click the blue highlighted button ("Open Skin Editor") to access the editor. |
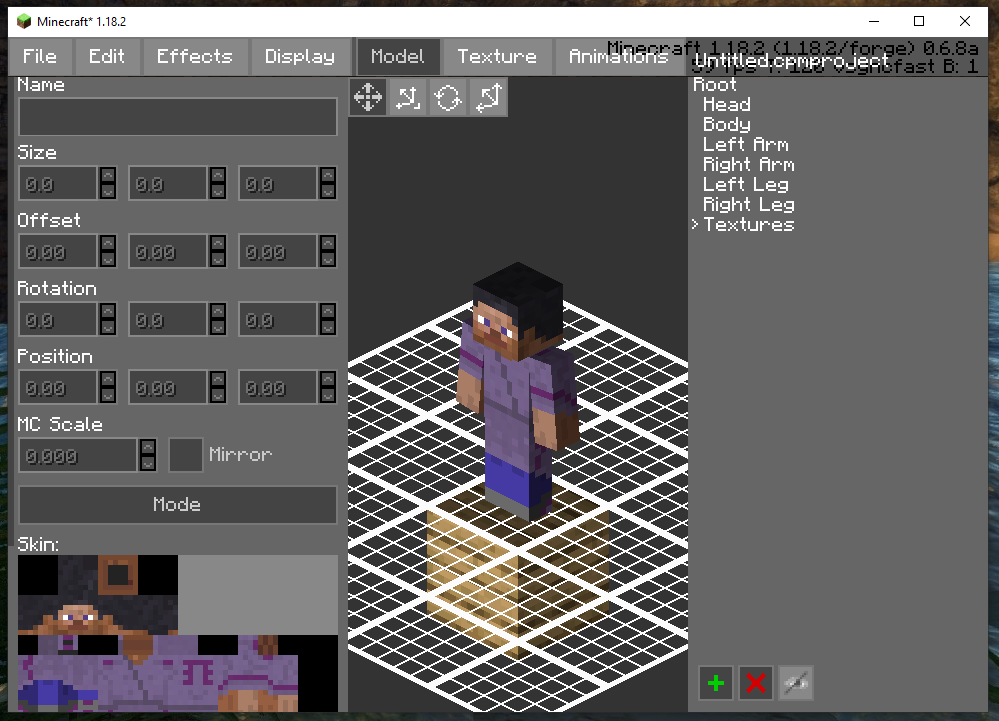
On a success you will be presented with something like THIS:
|
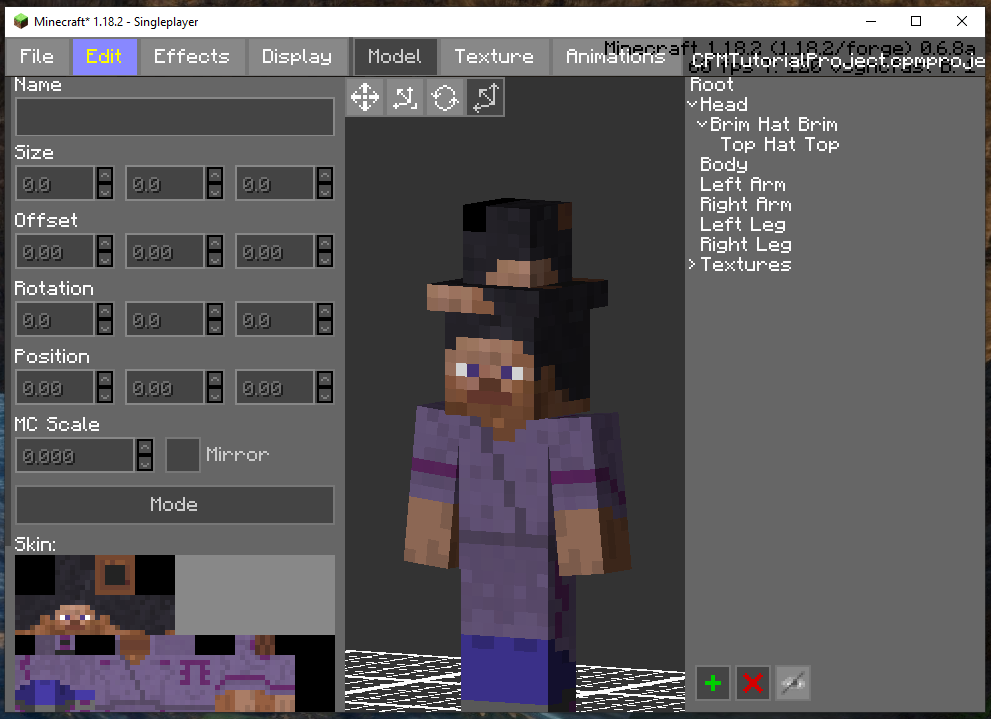
| Figure 2a: The skin editor interface. Look at all those buttons! And that horrible human I use as a vanilla player skin. Also PLEASE don't make your window this small. Fullscreen that thang! I only did this so the tutorial images would be a bit smaller and easier to view on my second monitor. |
This may look complicated but it's not that bad. Just take it one piece at a time.
To introduce the pieces of the editor in a way that you can understand, I am going to show by doing. Or do and then take screenshots.
2: VIEW & UI BASICS
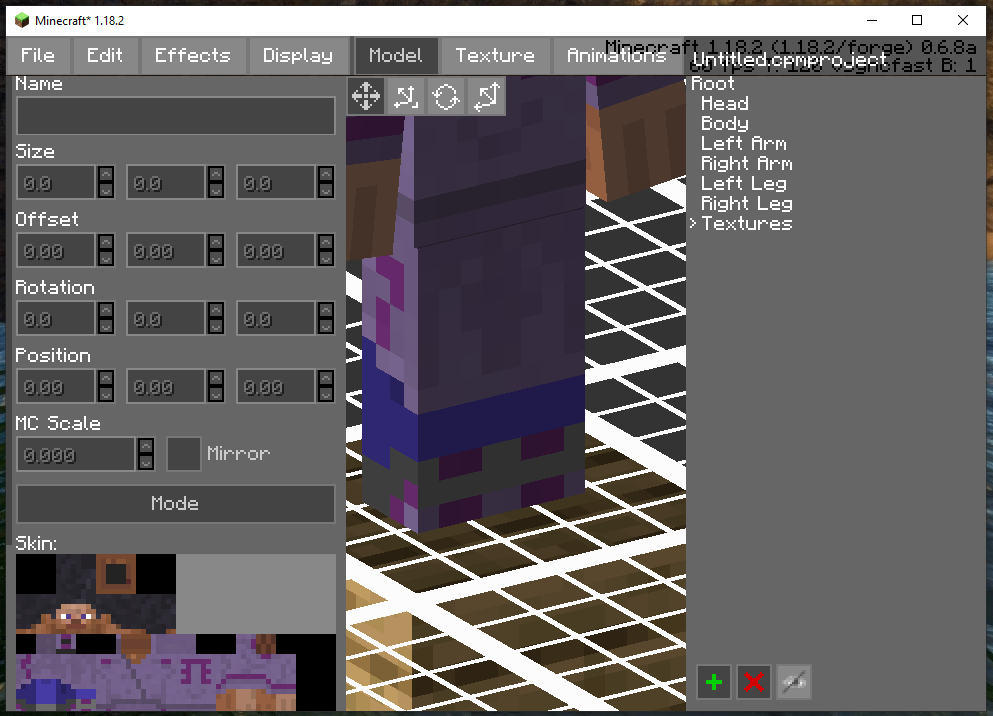
First things first. Let's rotate our model! Click and drag it while holding the middle mouse button.
Scrolling should zoom in and out, and using shift with the middle mouse button allows you to pan the view.
|
| Figure 2b: The same editor. The view in the center has been rotated, panned, and zoomed to give us a very good view of my failed attempt at texturing shoes. |
(If, like me, your mouse has decided not to acknowledge the existance of the middle mouse button, you can change this to something else by going to Edit --> Settings --> Keybinds
3: EDITING DEFAULT PARTS
Now to start doing some actual editing.
Click a part. It should be selected and surrounded by a white box. Some options in the left panel should also light up. Like so:
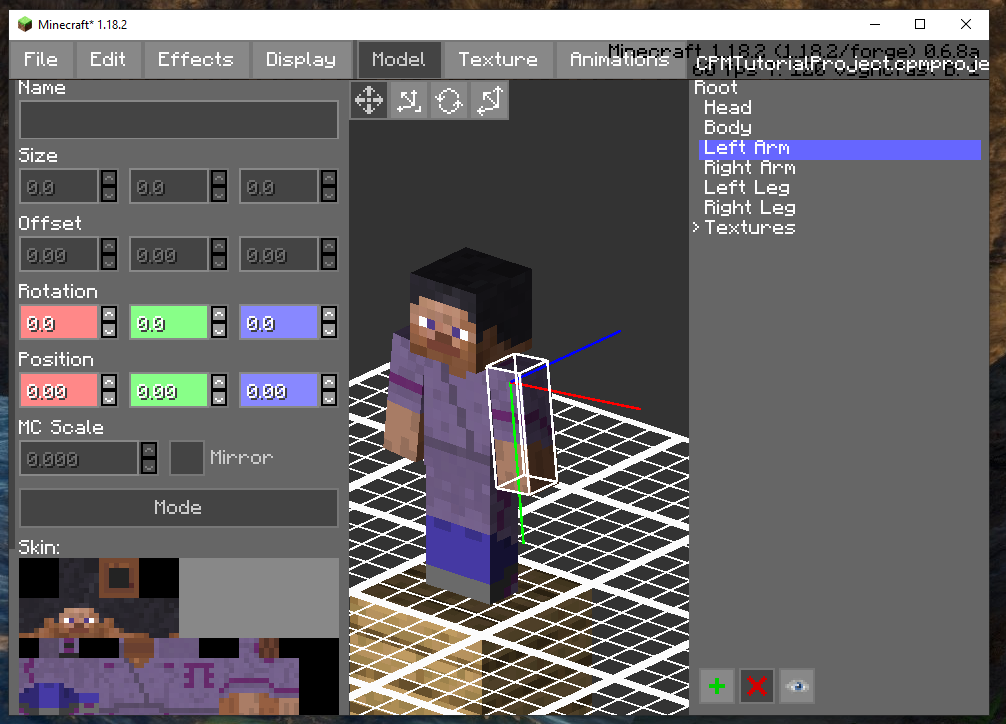
|
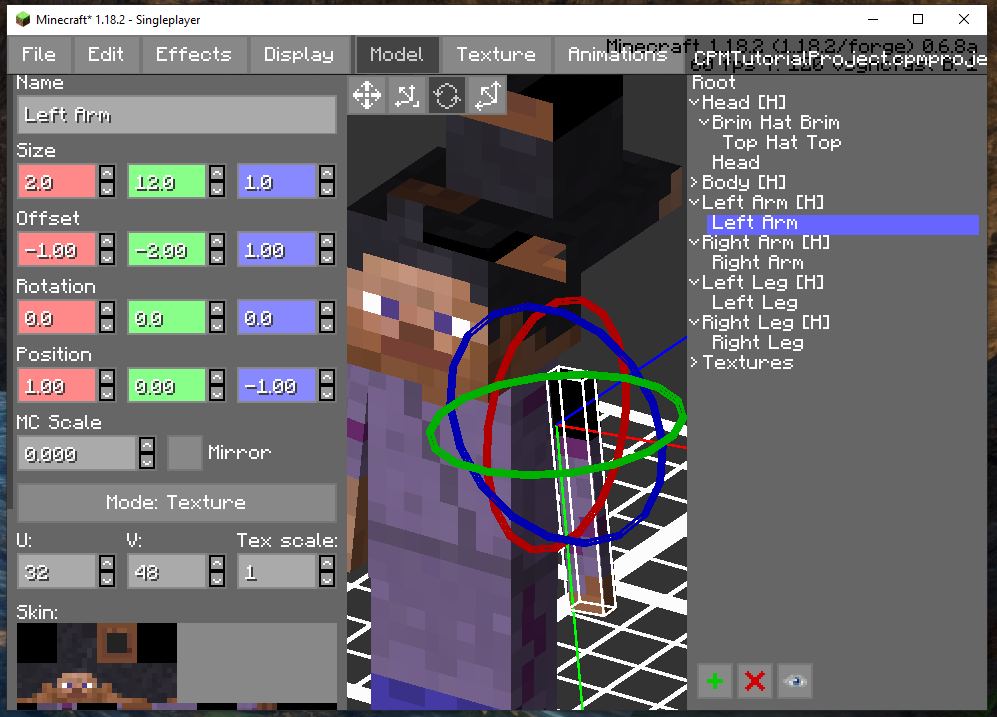
| Figure 3a: The steve?'s left arm has been selected. Three axis lines are coming off of it, and the Rotation and Position options in the left panel are enabled. |
Selecting the third or fourth tool in the upper left corner of the view window will bring up Widgets that you can click and drag to adjust the rotation or position of the arm.
For fine adjustment, you can change the lit numbers on the left. The arrows increment things by 1, 0.1, or 10 depending on whether you are holding Ctrl or Shift. Or you can just click and type in the boxes.
Don't worry, we're getting to tools 1 and 2 in a second...
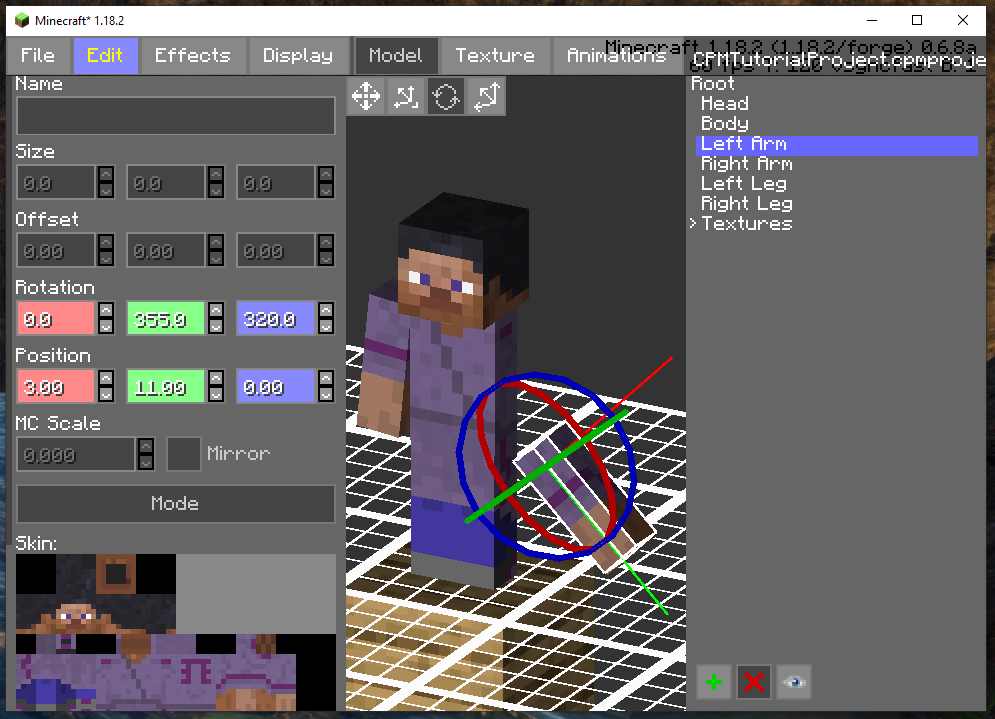
|
| Figure 3b: The steve?'s left arm has been dislocated and is now floating a few inches off the ground at an odd angle. Three circles surround it, presumably allowing for more wild rotations. |
Selecting "Test Ingame" under the File menu will allow us to see the effects of this change in an environment of your choice.
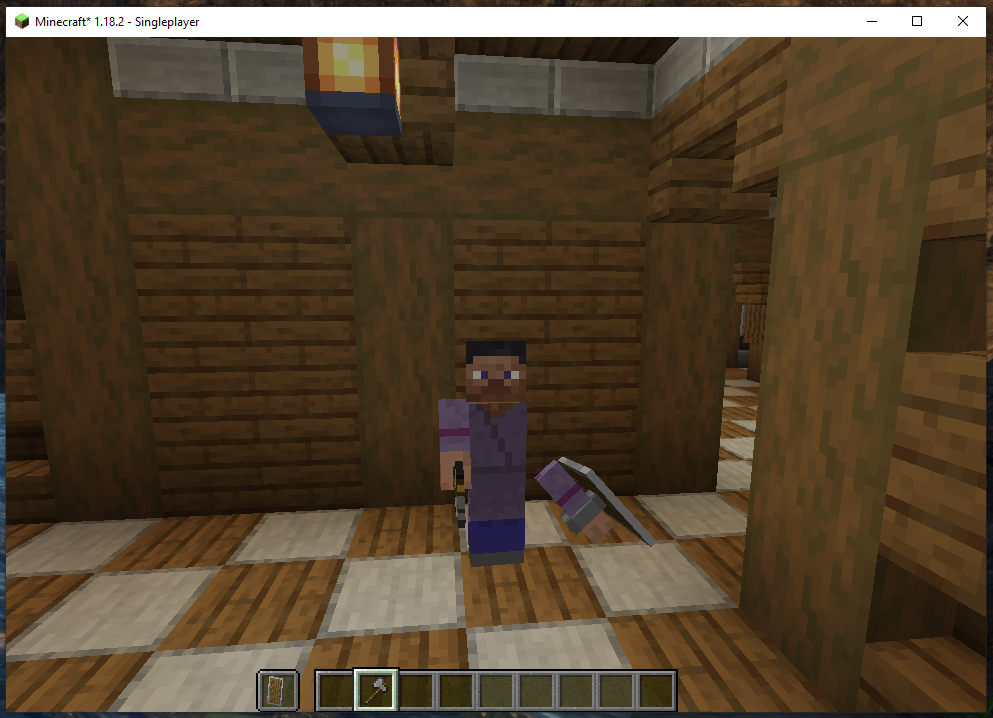
|
| Figure 3c: An in-game test. The steve? is standing indoors, holding a shield and an axe. The arm with the shield is floating a couple feet from its socket. This is NOT an effective combat position. |
Also, be sure to save frequently, either by using File --> Save or by pressing Ctrl + S.
4: ADDING & EDITING NEW PARTS
But one dislocated arm will not a model make, especially since we can't edit the size or shape of the parts.
Or at least, of THESE parts. We will have to add our own parts, and that is very simple to do.
Select a part you want to attach the new part to (I've chosen the head) and click the green Plus button at the bottom of the right panel. This should add a 1x1x1 black cube to the model.

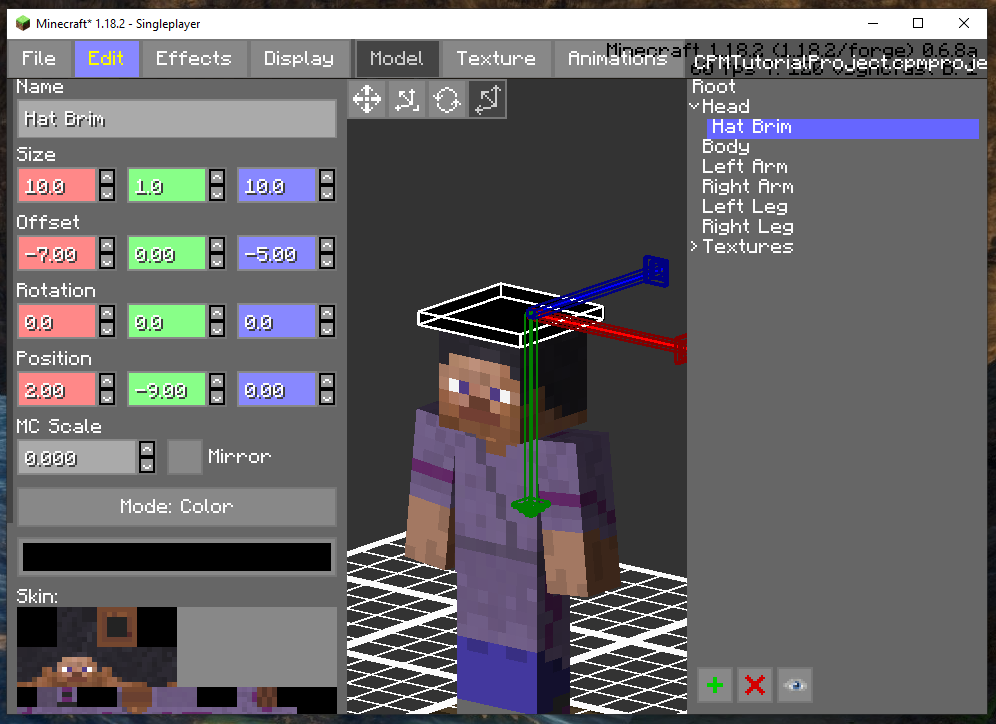
|
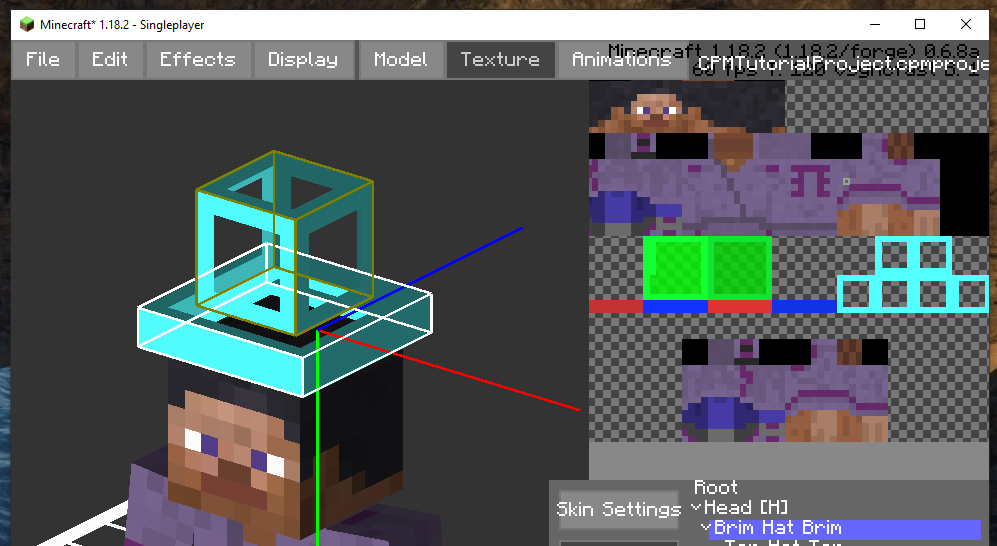
| Figure 4a: Back in the editor, a new part has been added attached to the head. It's currently inside the head and so is not visible, but the six Size arrows pointing out of it are. The left side window is fully lit-up, allowing the adjustment of size, offset, position, rotation, name, and something called "Mode: Color" that I'll get into in a second. |
And now, the Size and Offset options are available, as are the first two tools! With all of our powers unlocked, we can now move the cube to where we can see it, then scale it to be whatever size we want!
You can change the Name as well, so this part isn't just called New Part.
The Size tool just changes one dimension of the cube when the arrow is dragged. I'll explain Offset in a moment. For now, let's spawn another cube on this one and make a hat.
|

|
| Figures 4b and 4c: The position and sizes of two black cubes have been adjusted to form a crude top hat. |
But as it stands, our hat is very hard to see. It's pure black and has no textures! clicking the "Mode: Color" button on each of the new parts fixes this!
Or, mostly does.
|
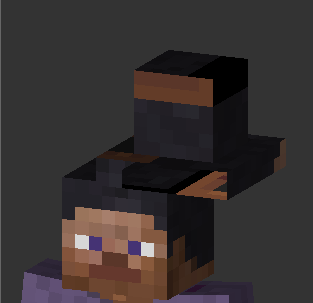
| Figure 4d: Our example hat now has a texture! It's pulled the texture from sections of the steve?'s head. |
But before we dive into the hellish domain of UV Editing , let's briefly touch on Offset.
Basically, when you change a part's Offset, you change where its Pivot, which is indicated by the three red, blue, and green lines that show up when you select a part.
Parts rotate around their Pivot position when asked to rotate, and parts that are attached to them are actually attached to the Pivot.
An arm, for instance, would have its Offset set to that its pivot is right at the shoulder. So that it swings like a normal arm does.
Now unless you were very careful in making your hat, its pivot is probably in an odd spot.
Which means, if it's rotated 180 degrees...
|
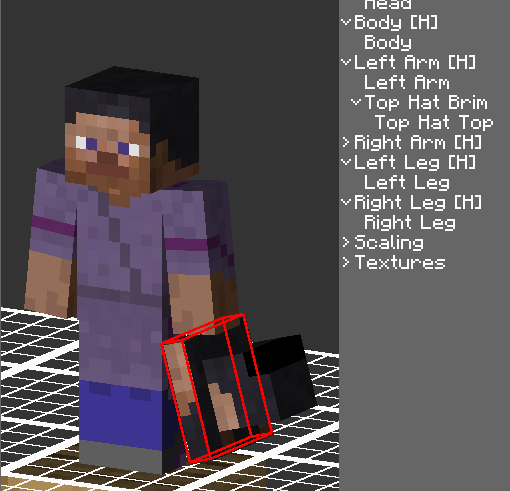
| Figure 4e: Our example hat has been rotated. It's now halfway off of the character's head. Also there's a transparent hole in it but that's a separate problem. At least the top part is still on the bottom one... |
Sometimes this is okay. Or even intended. But just keep in mind Offset when parts are going to be rotating or attaching to other parts.
Also. Notice how when you select your new part, its name in the hierarchy panel to the right is also selected? You can click the hierarchy panel names instead to select parts.
Also also. You CAN edit the size of the default parts. Or delete and replace them entirely with whatever cube collections you desire.
By going to Edit --> Tools --> Convert Vanilla Parts, you can turn the default parts invisible and replace them with copies that we CAN edit fully. Then just delete the copies and add your new parts!
Apparently this can break some other mods, but I need my weird inhuman arms and legs, dammit!
|
| Figure 4f: The steve?'s left arm has been replaced with a weird stick arm. In the hierarchy, each default part now has a hidden parent. The hat is still crooked. |
And lastly, we can take a part and re-attach it to a different part. Although you will usually need to reposition or re-offset the part afterwards.
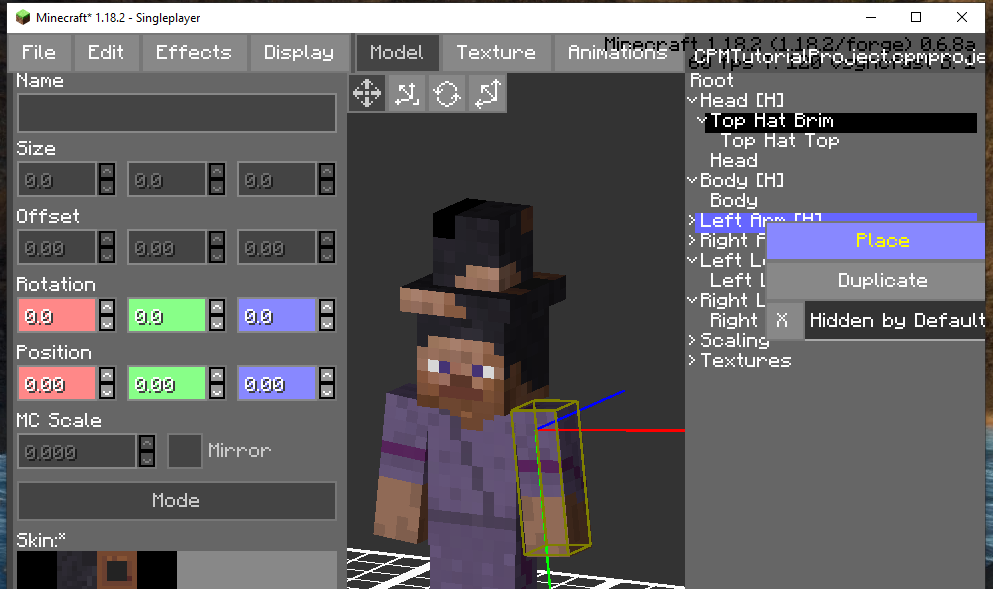
Right-click the part you want to move, click Move, then right click the part you want to move it TO and click Place.
|
| Figure 4g: Preparing to move the hat... |
|
| Figure 4h: After some adjustment, our steve? is now holding their hat. |
Through a combination of these tools, some mind-boggling effects can be created. But they'll all have the original skin texture...
...that is, until we change our tab from Model to Texture! Click the Texture button up at the top now.
5: TEXTURES

|
| Figure 5a: The "Model", "Texture", "Animations" buttons at the top of the UI are shown. "Texture" is selected. |

|
| Figure 5b: The Texture editing UI. One panel is visible, showing the current skin, the part hierarchy, and some buttons. |
Welcome to the Texture tab!
On the left we have the good old view of our model. But without the adjustment tools.
And on the left is our selected skin, along with tools to edit and assign parts to it!
Now then. A crash course in UV Editing. I promise I won't make you hate 3D Modeling. Much.
Each part CPM (and Minecraft in general) is a cube that is colored based on a texture. Think of it like printing the texture out on paper and gluing it to blank cubes. Then, a UV Map would be like instructions that tell the you where to cut and glue, and to which cube, and in what orientation.
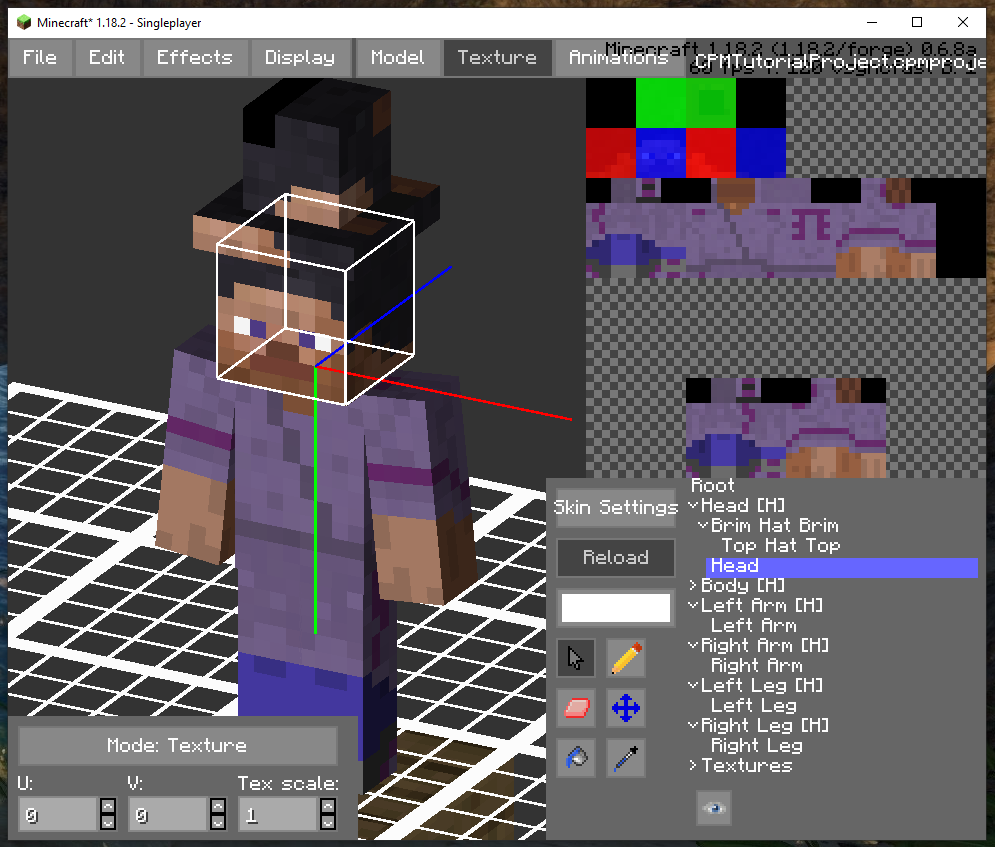
... I think I just made it more confusing. Let's try an example. Here, I've selected the steve?'s head. The head's UV map shows up on the skin as a colored overlay.
|
| Figure 5c: |
The red squares on the texture are mapped to the left and right sides, the blue squares are mapped to the front and back, and the green squares are mapped to the top and bottom.
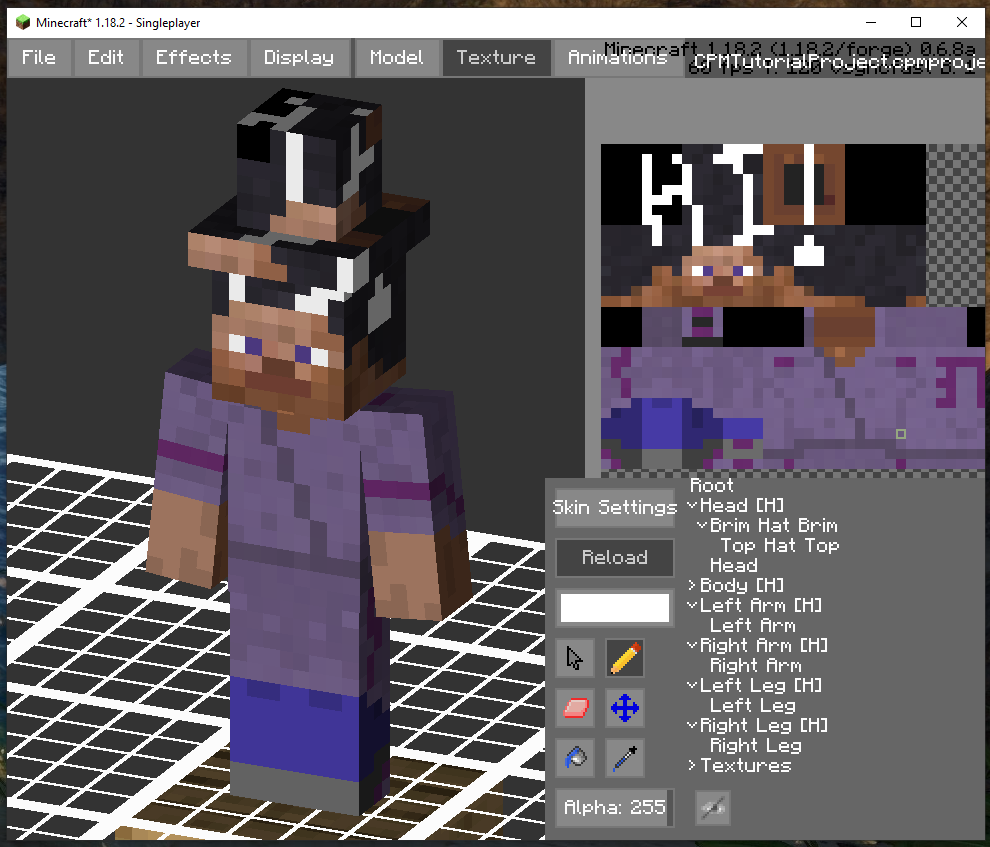
If we change what's on the texture in those areas, we change what's on the head. Let's use the Pencil tool and doodle on it as an example.
|
| Figure 5d: |
It also changes what's on the hat, since that's where the hat's UV maps are too. So let's move the hat UV maps to a blank spot on our texture.
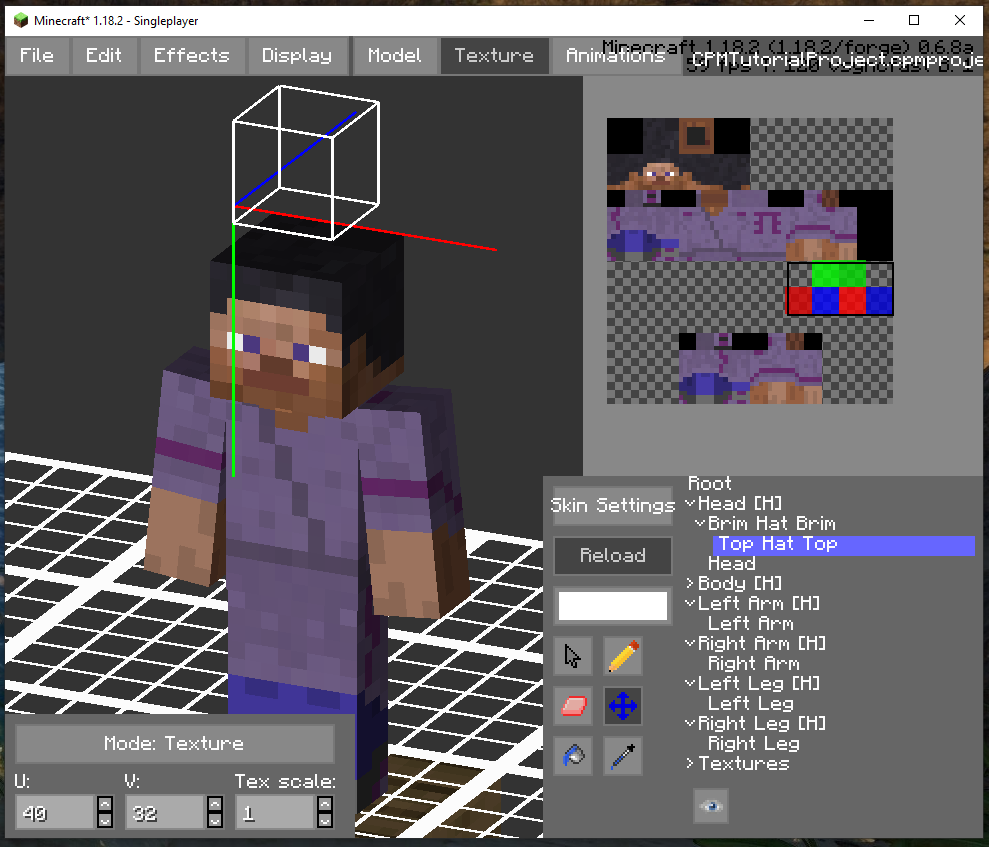
Select the hat brim, then use the blue arrows tool (or adjust the U and V values) to move the mapping. Do the same with the top.
(When doing this, it can also help to enable Show All UVs under Display.)
|
| Figure 5e: |
.... and now they've gone invisible because we moved them to a transparent spot!
You can do this on purpose if needed, but I don't think we want to rock the Just Got Blessed By The Scariest Witch On The Disc look. So.
Using the pencil tool, let's draw a frame that matches the size of our hat. This will show up on our texture as a series of boxes that show us where to color.
Now, save the texture using the Skin Settings menu and open the image in the image editor of your choice. Draw over the frame with some Real Tools as opposed to CPM's good-enough-i-guess tools, and then save over the image. Or save as a new image.
Hit Load in the Skin Settings menu and grab the texture. And, tada! Hat!
|
| Figure 5f: This blue frame isn't strictly needed, but doing it this way is much easier than playing Where's The UV Map and exporting / reloading a hundred times. |
|
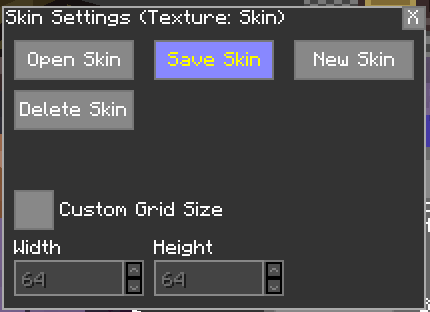
| Figure 5g: The skin settings menu. I guess this also lets you use larger images as textures but I don't worry about that. |
|
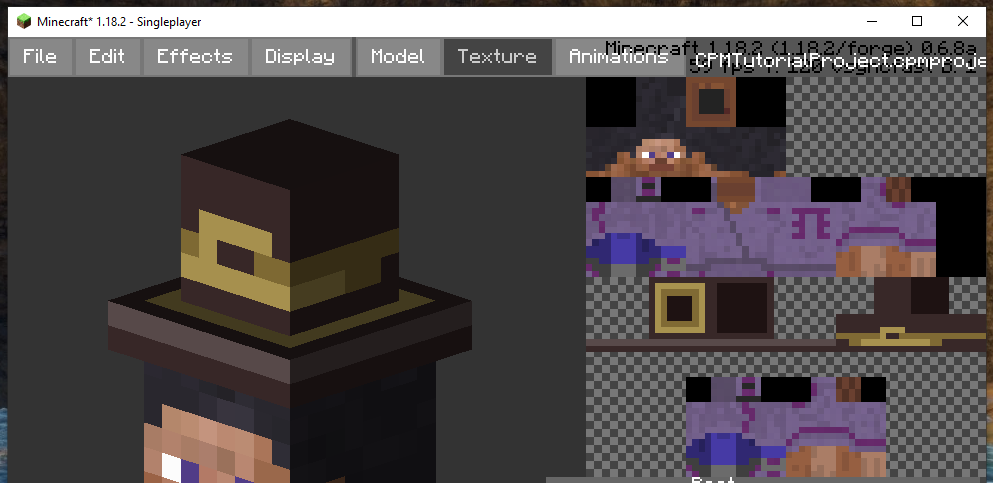
| Figure 5h: One ten-minute edit in GIMP later, and our texture now features a hat. Let's try it on... |
|
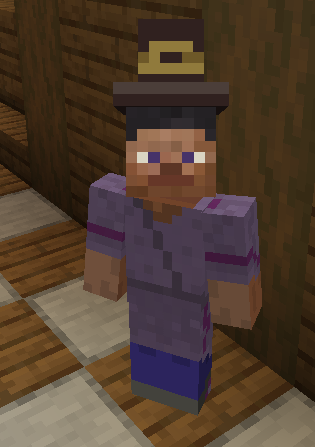
| Figure 5i: Our steve? now has a hat! Splendid! |
6: EFFECTS, ILLUSIONS, AND PARLOR TRICKS
Now that all the basics (except animation which I am saving for later) have been given to you, it's time to see what can be done with them! In addition to taking a closer look at the menu buttons.
First the Effects menu!
I'll be honest, I don't know what all of these do. Check the in-game documentation I guess.
|
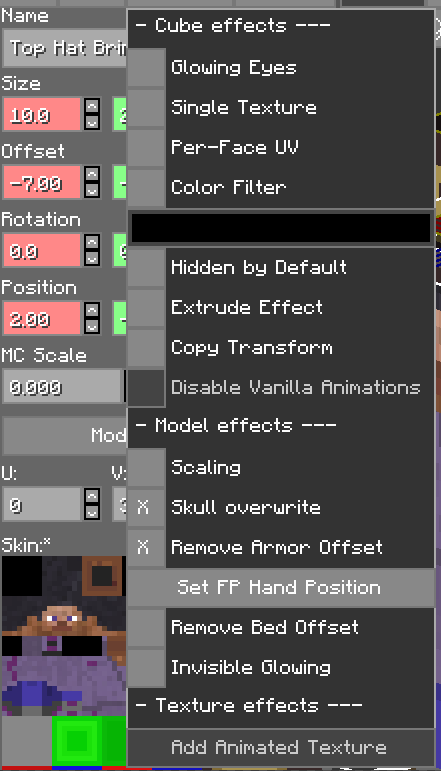
| Figure 6a: The effects menu. Also I corrected the part name "brim hat brim" to "top hat brim" because I was an idiot. |
These options work on individual parts:
- Glowing Eyes: Turns the part transparent and makes it glow in the dark. Perfect for, as stated, glowing eyes. I use this a LOT for screens.
This can cause some glitchy behaviour in special circumstances, especially on versions before 1.18, since it's basically a recreation of a shader meant ONLY for spider / enderman glowy eyes. - Single Texture: Each side of the cube now has the same UV map as the largest side. If you make a flat plane and use this, both sides will be the same.
- Per-Face UV: Lets you adjust the UV map of each face of the cube individually. Lets you remove sides without leaving big transparent holes in your texture. Or lets you make a part higher-resolution by making the UV map larger than the part. You won't need to use this very often, but it can be very useful when you DO need it.
- Color Filter: Lets you recolor to a part. This can be done with Animations too. Another day.
- Hidden by Default: A very useful option that lets you hide parts without using animations.
- Extrude effect: I've no idea how to get this to work.
- Copy Transform: Not sure about this either. Might be worth looking into though...
- Disable Vanilla Animations: You know that arm-swingy-thing mobs do when standing around? This turns that off.
These ones apply to the whole model:
- Scaling: There's a mod called Pehkui that links up with CPM. It lets you change the size and properties of some entities, including players. I've used this for extra-small kobold playermodels before, but there's probably more reasonable uses out there...
- Skull Overwrite: If this is enabled, the player's head is hidden when wearing a skull. If you have pieces you want to show through the skull, you'll need to disable this, and maybe set up an animation to adjust the position of the parts when wearing a skull.
- Remove Armour Offset: I don't really work with armour so I don't know what this does.
- Set FP Hand Position: Allows you to adjust the position of the first-person-view hand. (I think I only used this once and it was for a model where the player held items in their mouth. In which case I adjusted the hand to look like the top of a snoot.)
- Remove Armour Offset: I've never been on a server with this mod so I don't know what this does either.
- Invisible Glowing: Allows Glowing Eyes parts to show even when the player is invisible. I think. This option shows up a bunch of times in other places so I don't really know.
and Add Animated Texture is a story for another day.
|
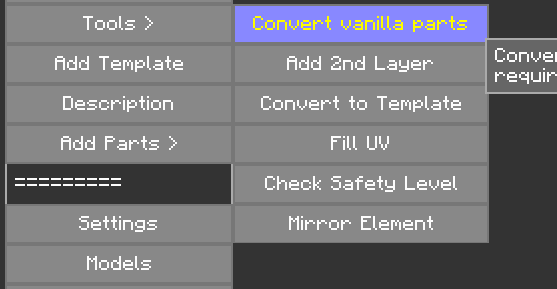
| Figure 6b: The Edit --> Tools menu. |
the Edit --> Tools also has some useful functions
- Convert Vanilla Parts: Hides the default parts and makes editable / deleteable copies. Always do this unless it breaks things.
- Add 2nd Layer: Adds slightly larger parts around the default model, like the vanilla skin hat / jacket functions.
- Convert to Template: Sounds useful. No idea what this does. Find out and get back to me.
- Fill UV: Likewise, no idea.
- Check Safety Level: I think this displays model stats to ensure that it isn't too render-intensive.
- Mirror Element: Flips a part around the X axis of its parent part. Use this when moving a part from the left to the right, or vise-versa.
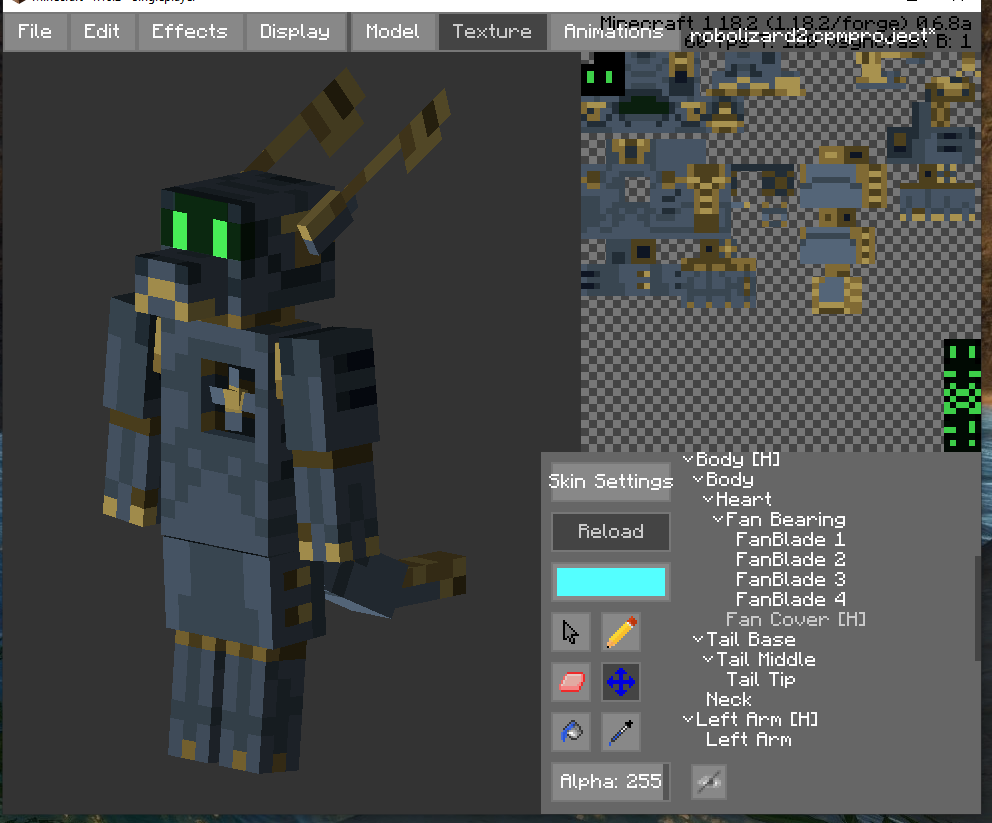
Let's look at an actual model for some example uses. Here's one of a random robot with an exposed fan. I have the fan set to rotate based on animations but we don't need to worry about that right now.
|
| Figure E1-a: *Robot kobold noises* |
The screen has a Glowing Eyes part overlaid on it, letting their screen light up in the dark. Their flags use the Single Texture option to avoid using up extra texture space.
When making the ear / antennae, I used Mirror Element to avoid doing the same thing twice. Same with the arms and legs.
Wondering about the fan? It's actually quite a simple trick. The body has a transparent section on it, and I've put a cube behind it with another transparent face. Can't remember if I used Per-Face to remove it or just left a 4x4 hole in the texture. Either way, The fan is inside the second cube and the fan blades are parented to the fan bearing.
|
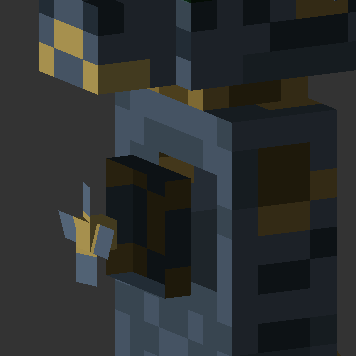
| Figure E1-b: The fan assembly, exploded for your convenience. I'm very happy with how well this turned out. |
|
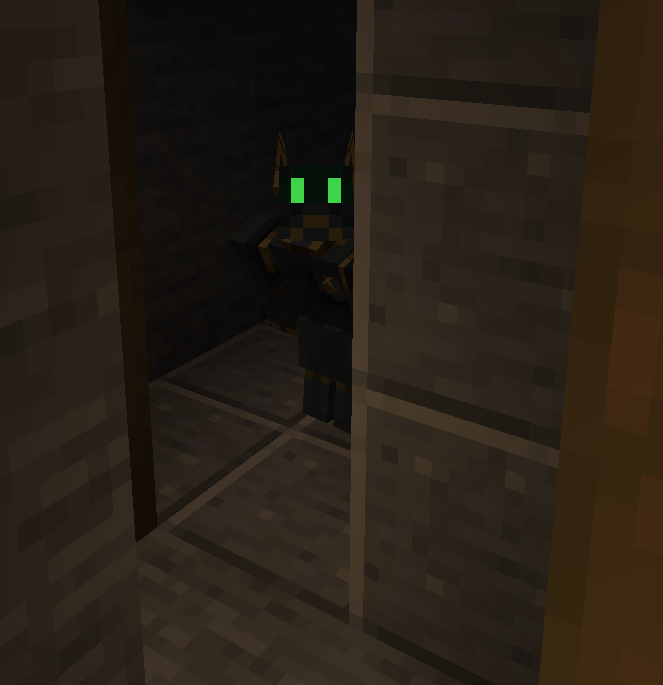
| Figure E1-c: They are actually very bad at sneaking on account of having a very bright CRT screen and very rough motors. |
Now, I'm very eepy at the moment. I do PLAN to do a tutorial on animations. Soon(tm). But not today.